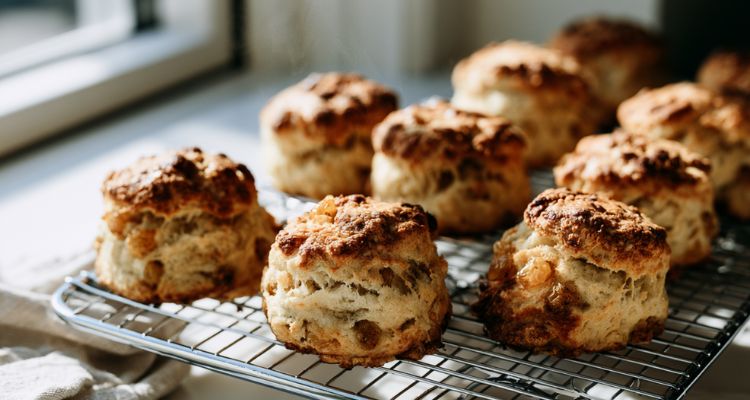

Gordon Ramsay’s perfect scones are classic British scones made with self-raising flour (self-rising flour), unsalted butter, sultanas (golden raisins), one egg, and ice-cold milk, baked at 350F (180C) for 20-25 minutes. The whole batch takes under 40 minutes start to finish, and makes 8-10.
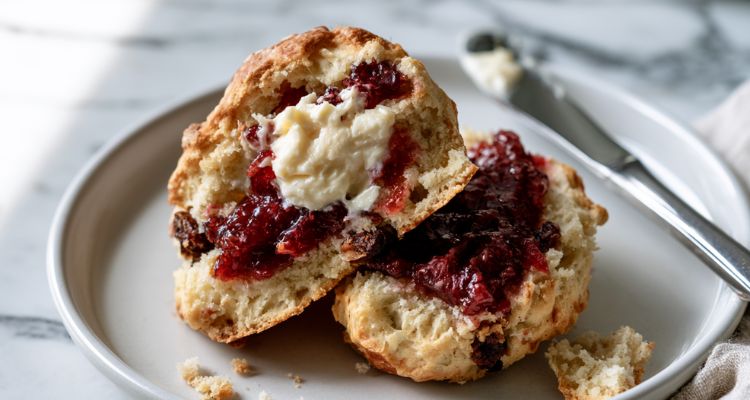
The recipe comes from Gordon Ramsay’s Secrets (2003), where he writes: “I despair that so many people have only ever tasted mass produced scones. Homemade ones are so much better and it takes very little time to mix the dough, pat it out, shape and bake.” He serves them split and buttered, with or without clotted cream and homemade strawberry jam.
His version bakes at a lower temperature than most recipes call for, and that’s intentional. Most recipes push 400-425F (200-220C). Ramsay drops to 350F (180C) because the lower heat keeps the outside soft while the scone still rises beautifully, instead of forming a hard crust that locks in a dense middle.
Gordon Ramsay Scone Recipe
Course: BreakfastCuisine: BritishDifficulty: Easy8-10
15
minutes25
180
kcalA classic British bake from Gordon Ramsay’s Secrets, made the traditional way. Soft and light on the inside with a golden top, these are the kind of scones most people have never had homemade. Best served warm, straight from the oven.
Ingredients
2 cups (250g) self-raising flour (self-rising flour), plus extra for dusting
1 tsp baking powder
Good pinch of fine sea salt
3 tbsp (45g) unsalted butter, softened
1 tbsp caster sugar (superfine sugar), plus extra to sprinkle
1/3 cup (50g) sultanas (golden raisins)
1 large free-range egg
Scant 1/2 cup (100ml) ice-cold milk, plus extra to glaze
Directions
- Preheat and prep: Heat the oven to 350F (180C), Gas 4. Line a baking sheet with parchment paper.
- Build the base: Sift the flour, baking powder, and salt into a large bowl. Add the butter in small pieces and rub it in using the tips of your fingers, lifting the flour up high as you go to aerate it. When the butter is fully incorporated the mixture should look like fine breadcrumbs. Stir in the caster sugar, then the sultanas.
- Mix the dough: Beat the egg with the milk in a separate bowl. Pour about three quarters of it into the flour mixture and quickly mix together with a large table knife, adding more of the egg and milk mix as needed to give a soft but not sticky dough. Do not over-mix. The quicker and lighter the mixing, the higher your scones will rise.
- Shape and cut: Tip the dough onto a lightly floured surface. Gently roll with a rolling pin or pat out with your fingers to a 3/4-1 inch (2-2.5cm) thickness. Using a 2.5 inch (6cm) round cutter, press out as many rounds as you can. Gently re-shape and lightly roll the trimmings to cut out a couple more rounds.
- Bake: Place the rounds on the lined baking sheet. Brush the tops with milk and sprinkle lightly with extra sugar. Bake for 20-25 minutes until risen and golden brown. To check they’re ready, lightly squeeze the sides of one: the dough should feel springy. Slide onto a wire rack to cool. Eat within an hour or so of baking, while still warm.
FAQs
Why does Ramsay bake scones at a lower temperature than usual?
Most scone recipes call for 400-425F (200-220C). Ramsay bakes his at 350F (180C), about 50 degrees cooler than the standard.
At higher temperatures the outside crust sets quickly and firms up before the inside has fully risen. You end up with a hard shell and a dense, under-risen centre. The lower heat gives the scone more time to rise before the crust locks it in, so the outside stays soft while the inside climbs.
Why does he use ice-cold milk?
The recipe specifies ice-cold milk, not just cold. That’s the same principle as cold butter in pastry: keeping the fat cold stops the gluten in the flour from developing too quickly when the liquid hits it.
Warm liquid activates the gluten faster, which makes the dough tougher and the final scone chewier rather than tender. Ice-cold milk keeps everything relaxed until it hits the oven.
Why mix with a table knife instead of your hands?
Ramsay uses a large table knife to bring the dough together, not hands. Hands transfer heat, and body heat softens the butter in the dough. Once the butter warms up you lose the crumb structure that makes a scone rise and flake rather than spread flat.
A knife blends without warming. It also prevents over-mixing: you can see when the dough is just coming together and stop immediately. He’s explicit in the book: “the quicker and lighter the mixing the higher your scones will rise.”
How does the savoury version differ from the sweet one?
Both versions use the same base dough at the same proportions. For the savoury version, Ramsay drops the sugar and sultanas entirely, then adds 2oz (50g) finely grated mature Cheddar or Parmesan and 1/2 tsp powdered English mustard into the crumb before the liquid goes in. He sprinkles extra cheese on top before baking too.
The mustard powder doesn’t make them taste of mustard. It sharpens the cheese flavour and adds a little background heat. The sweet version, by contrast, pairs naturally with clotted cream and homemade strawberry jam as Ramsay suggests in the book.
Why eat them within an hour of baking?
Ramsay is clear in the book: “Eat the scones within an hour or so of baking, while still warm.” This is honest storage advice, not a suggestion.
Scones have very little fat compared to biscuits or shortbread, which means they dry out fast. The crumb that makes them light and tender when warm turns dry and crumbly within a few hours. The sultanas help slightly because they hold moisture, but there’s no fixing a scone that’s gone cold and stale. Make them when you’re ready to eat them.
Why does he check by squeezing the side rather than testing the top?
Pressing the top of a scone tells you almost nothing because the sugar glaze firms up from the start. Squeezing the sides tells you what’s happening to the actual dough inside.
Springy sides mean the structure has set and the crumb has cooked through. Soft, doughy sides mean they need more time, even if the top looks golden. It’s the same logic Ramsay applies across his baking: check the texture, not just the colour. You can also check the base, which should be dry and pale gold, not pale and soft.

I’m Ava Taylor. I’m A Self-taught Home Cook Who Loves Gordon Ramsay Recipes. I Try Every Dish In My Small Apartment Kitchen And Tweak It Until It Works. I Write Clear Steps With Simple Words So Anyone Can Follow. I Share Honest Wins, Mistakes, And Quick Tips To Help You Cook With Confidence.