I assumed banana pudding was one of those “dump it in a bowl and chill it” kind of desserts. And technically? It is. But what I ended up with was soupy, overly sweet, and weirdly artificial. The bananas turned grey. The wafers got soggy. The whipped topping felt like foam.
Then I looked at how Gordon Ramsay would approach it: he wouldn’t just mix and chill—he’d build texture, layer flavor, and control sweetness. He’d treat it like a plated dessert that happens to come together in minutes. That mindset changed everything.
Why This Works (And Where Most Go Wrong)
What makes this version so much better?
- Balancing creaminess with crunch. It’s all about timing and layering—those wafers shouldn’t be mush.
- Whipping the base slowly. Ramsay wouldn’t leave lumps or let the whipped topping collapse.
- Flavor over sugar. Real vanilla, not just “vanilla-flavored pudding.” Huge difference.
Where people ruin it:
- Over-mixing the whipped topping into the pudding—kills the texture
- Using under-ripe or overripe bananas
- Not chilling it long enough for the pudding to set and the flavors to meld
Ingredients That Actually Matter
- Cold Milk (475ml) – Use whole milk for the creamiest base. Skim milk makes it too thin.
- Instant Vanilla Pudding Mix (1 package) – Standard 96g pack. Avoid sugar-free—it messes with the texture.
- Sweetened Condensed Milk (396g can) – Thickens the mix and adds richness. Don’t substitute evaporated milk.
- Vanilla Extract (1 tbsp) – Real, not imitation. Adds dimension to the boxed pudding.
- Frozen Whipped Topping (340g, thawed) – Adds volume and lightness. Use whipped cream if you want a fresher feel.
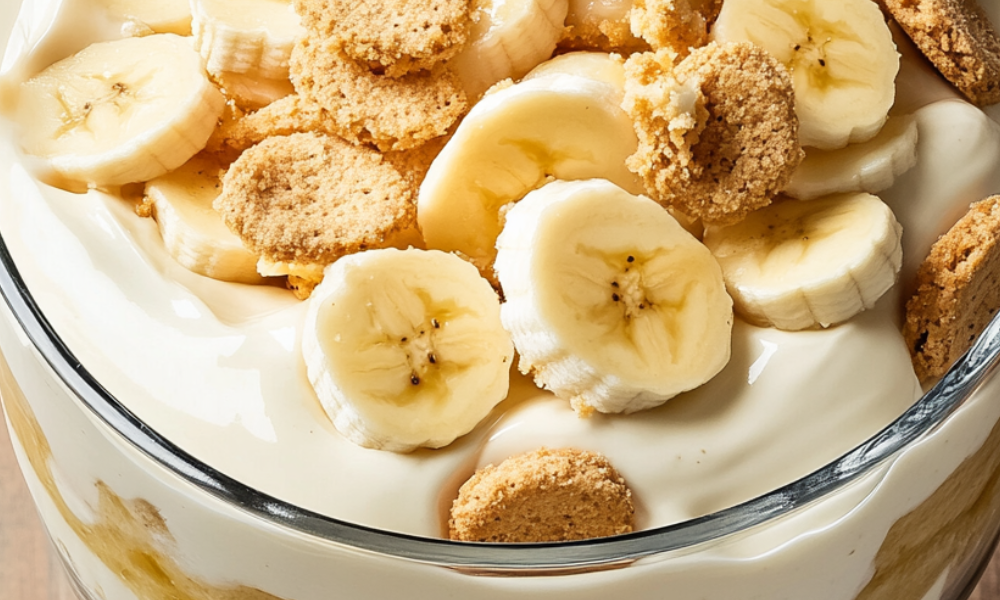
- Vanilla Wafers (450g package) – Classic Nilla or any crisp butter cookie will do.
- Small Bananas (14, sliced) – Ripe but not browning. You want sweet with structure.
How To Make Gordon Ramsay Banana Pudding
Step 1 – Mix the base
Whisk cold milk and pudding mix for 2 full minutes until thickened. Don’t under-whisk—this is what sets your base.
Step 2 – Add richness
Stir in the sweetened condensed milk until fully incorporated. No lumps. No shortcuts.
Step 3 – Flavor and fluff
Add vanilla extract, then gently fold in the whipped topping. Use a spatula, not a whisk. The goal is light and airy, not deflated.
Step 4 – Layer like a pro
In a clear glass trifle dish (or deep bowl), start with a layer of vanilla wafers. Then add banana slices, then pudding. Repeat. Top layer should be pudding.
Step 5 – Chill
Cover and refrigerate for at least 1 hour. 4 hours is better. Overnight is best. It gives the wafers time to soften into sponge-cake texture without going mushy.
Step 6 – Finish and serve
Top with extra banana slices or crushed wafers just before serving for crunch. Want to go full Ramsay? Add a dusting of cocoa or a drizzle of caramel sauce.

What Gordon Ramsay Says About Banana Pudding (Indirectly)
“If you’re not elevating a classic, you’re just repeating it.”
→ The trick here is texture control and flavor balance. Don’t let it go bland and mushy.
“Cream needs contrast—give it something to cut through it.”
→ That’s why the cookie crunch and banana acidity matter. They balance the creaminess.
“If you’re layering, layer with intent.”
→ Every spoonful should give you banana, cookie, and cream—not just pudding.
What I Got Wrong (And How I Fixed It)
- Overmixed the whipped topping. It turned into soup. Now I fold with a spatula, gently.
- Used bananas that were too ripe. They browned and got slimy. Ripe with a bit of firmness is perfect.
- Skimped on layering. Just dumped it all in. Now I take 5 minutes to build proper layers—it’s night and day.
Variations That Actually Hold Up
- Use chocolate pudding instead of vanilla – More decadent, dessert-forward.
- Swap vanilla wafers for Biscoff or ginger snaps – Adds warmth and spice.
- Add peanut butter swirl – Stir into the pudding base or layer it with bananas for a southern-fusion twist.
Avoid:
- Frozen bananas (they go mushy)
- Sugar-free pudding mix (affects texture)
- Skipping the chill time (ruins the set)
Pro Tips That Change the Game
- Slice bananas right before layering – Minimizes browning.
- Use clear glass – Presentation matters. This is a dessert you see before you taste.
- Chill your dish first – Helps the pudding set faster and tighter.
Storage + Leftover Moves
- Fridge: Airtight container, up to 3 days.
- Avoid freezing – Bananas go grey and wafers turn to mush.
- Leftover move: Blend into a milkshake or spoon over pancakes with maple syrup and crushed cookies.
FREQUENTLY ASKED QUESTIONS
Q: Can I use homemade whipped cream instead of topping?
A: Yes—and it’s even better. Use cold heavy cream, whip to soft peaks, and fold gently.
Q: Can I use cooked pudding instead of instant?
A: Yes, just make sure it’s completely cooled before folding in whipped topping.
Q: What’s the best way to keep bananas from browning?
A: Slice right before assembly, or toss lightly with lemon juice (but don’t overdo it or they’ll taste tart).
Q: Can I make this in advance?
A: Absolutely. It’s best after at least 4 hours in the fridge. Just add final toppings right before serving.
Try More Recipes:
- Gordon Ramsay Buttercream Frosting Recipe
- Gordon Ramsay Baked Alaska Flambé Recipe
- Gordon Ramsay Bread And Butter Pudding Recipe

Gordon Ramsay Banana Pudding Recipe
Course: DessertsCuisine: AmericanDifficulty: Easy8
10
minutes140
A no-bake classic turned creamy crowd-pleaser. This banana pudding layers soft vanilla wafers, ripe bananas, and velvety pudding in a dish that chills fast and vanishes faster.
Ingredients
475ml cold milk
1 package instant vanilla pudding mix
396g can sweetened condensed milk
1 tbsp vanilla extract
340g container frozen whipped topping, thawed
450g package of vanilla wafers
14 small bananas, sliced (or to taste)
Directions
- Whisk milk and pudding mix for 2 minutes until thickened.
- Stir in condensed milk until smooth.
- Add vanilla. Fold in whipped topping gently.
- In a dish, layer wafers, bananas, and pudding. Repeat.
- Chill at least 1 hour (4+ is better).
- Top with crushed wafers or sliced bananas. Serve cold.
Notes
- Slice bananas right before layering – Minimizes browning.
- Use clear glass – Presentation matters. This is a dessert you see before you taste.
- Chill your dish first – Helps the pudding set faster and tighter.

I’m Ava Taylor. I’m A Self-taught Home Cook Who Loves Gordon Ramsay Recipes. I Try Every Dish In My Small Apartment Kitchen And Tweak It Until It Works. I Write Clear Steps With Simple Words So Anyone Can Follow. I Share Honest Wins, Mistakes, And Quick Tips To Help You Cook With Confidence.